Installing Epoxy On a New Concrete Floor
A brand-new concrete slab looks like the perfect canvas for an epoxy coating — clean, uncracked, untouched. But new concrete is also where we see the most coating failures, because eager homeowners (and some contractors) coat it too soon. Epoxy over concrete that has not finished curing will blister, bubble, and peel, and there is no fixing that short of grinding everything off and starting over. Here is how we approach new-slab epoxy jobs across Austin, and what you should know before scheduling yours.
Let the Concrete Cure First
Concrete does not dry — it cures, through a chemical reaction that consumes water over weeks. The industry-standard wait before coating a new slab is 28 to 30 days minimum, and in practice we often want 60 days for slabs poured in cooler or wetter months. During curing, the slab is releasing moisture vapor constantly, and an epoxy coating applied over that outgassing slab traps vapor underneath. Trapped vapor becomes bubbles; bubbles become peeling.
Austin's climate helps and hurts here. Our summer heat accelerates curing, but a slab poured during a wet spring over our clay soil can hold moisture longer than the calendar suggests. The pour date alone is not enough information — which is why the next step matters.
Moisture Testing Is Non-Negotiable
Before we coat any slab, new or old, we test it. The quick check is a calcium chloride test or a plastic sheet test taped to the slab for 24 hours — condensation under the plastic means the slab is still releasing vapor. The more precise method is a relative humidity probe drilled into the slab itself. For most epoxy systems, we want the slab's internal RH below roughly 75 to 80 percent, or a vapor emission rate the coating manufacturer will actually warranty.
If the slab tests wet, the answer is not to skip the coating — it is to either wait longer or apply a moisture-mitigating epoxy primer designed to handle higher vapor levels. That primer adds cost, but it is a fraction of what a failed coating costs to redo.
Surface Prep: Grinding, Not Acid Etching
Even a freshly finished slab is not ready for epoxy as-is. Troweled concrete has a smooth, dense surface layer (and often a curing compound on top) that epoxy cannot bite into. We diamond-grind every floor we coat, opening the surface to a texture like 60-grit sandpaper so the epoxy can key in mechanically. Grinding also removes curing compounds, sealers, and laitance — the weak, powdery layer that forms on top of new pours.
You will see DIY kits recommend acid etching instead. Acid etching is inconsistent, leaves residue that interferes with adhesion, and does not remove curing compounds at all. On a new slab that had curing compound sprayed on it — which is most of them — acid etching almost guarantees a failure. Grinding is the professional standard for a reason.
Choosing Your Finish: Flake, Metallic, or Solid Color
Once the slab is cured, tested, and ground, the fun part is picking the system. Three finishes cover nearly every residential job we do:
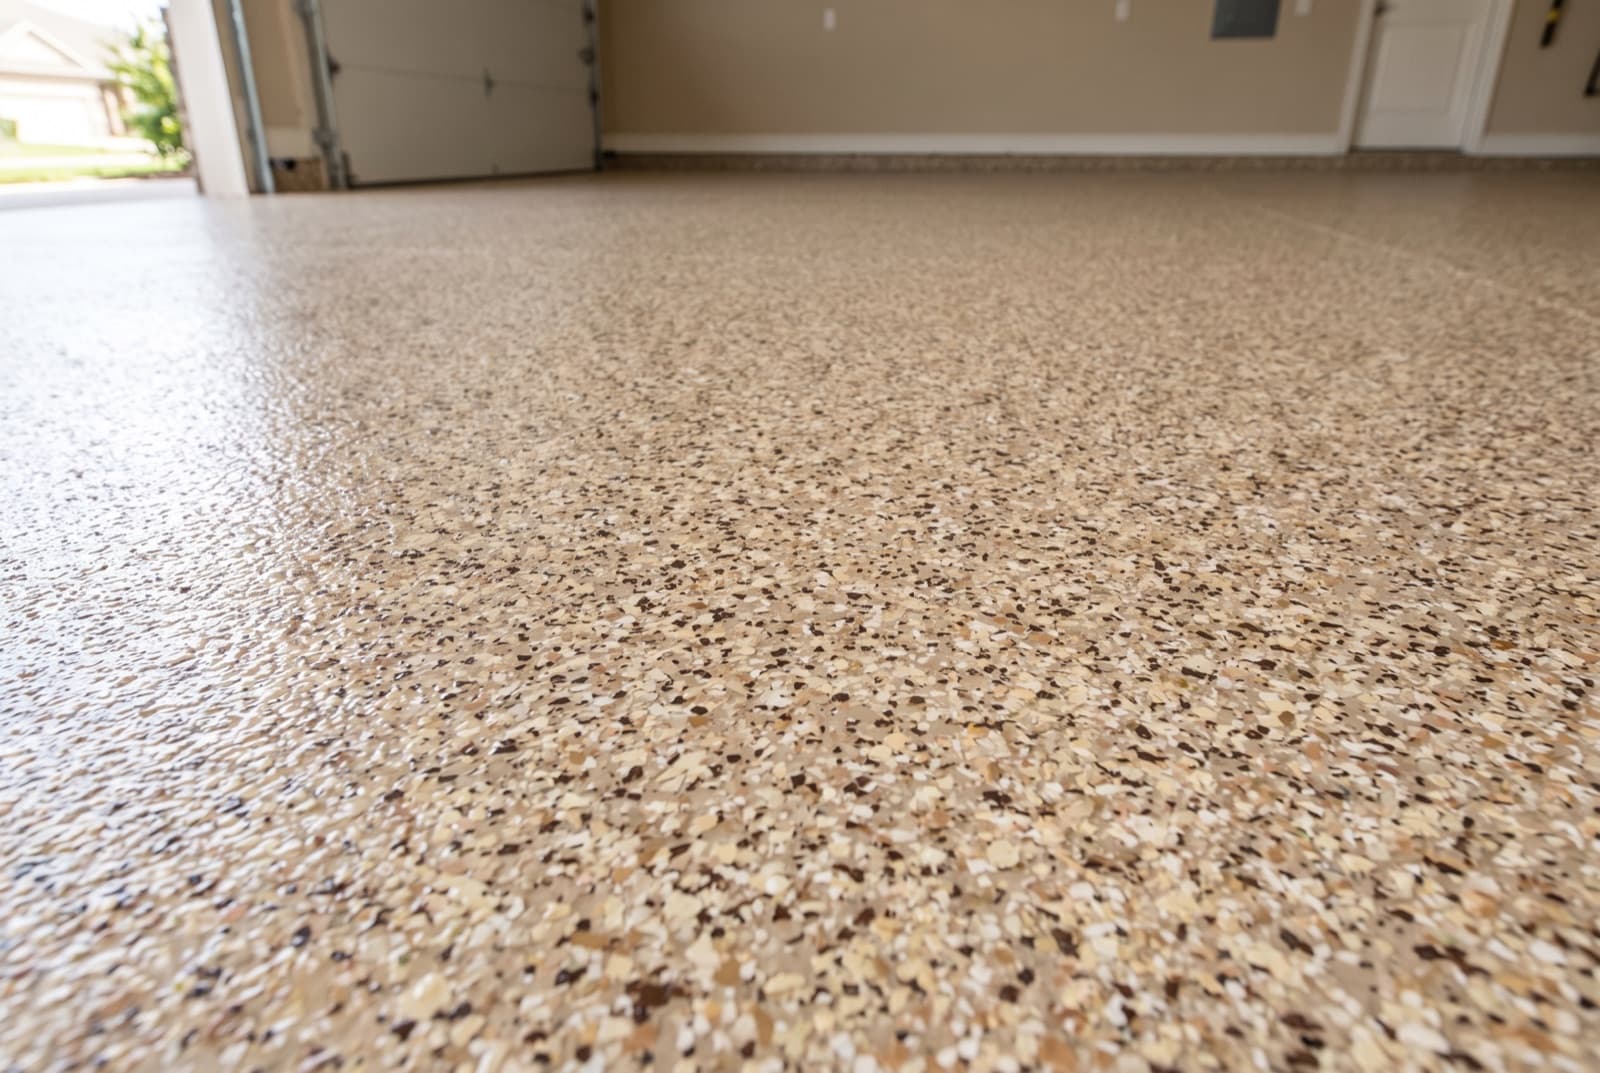
- Full flake: vinyl color chips broadcast into the base coat, then sealed under a clear topcoat. This is the most popular garage floor finish in Austin by a wide margin. The flake hides dust, tire marks, and minor slab imperfections, and adds texture for slip resistance. Grays, greiges, and earth-tone blends are the current favorites.
- Metallic epoxy: metallic pigments swirled through a clear epoxy for a marbled, one-of-a-kind look. Popular for home gyms, offices, and showroom-style garages in newer builds around Mueller and East Austin. It is striking, but it shows dust more than flake and costs more per square foot.
- Solid color: a clean, uniform finish in gray, tan, or custom colors. The budget-friendly workhorse for shops, storage areas, and commercial spaces.
Why the Topcoat Should Be Polyaspartic
The base coat bonds to the concrete; the topcoat takes the abuse. For that top layer we use polyaspartic rather than standard epoxy, and the difference matters in Texas. Polyaspartic is UV-stable, so it will not yellow where sunlight hits the floor through an open garage door — plain epoxy topcoats amber noticeably within a couple of years here. It is also more abrasion-resistant and handles hot tire pickup better, which is the classic failure mode of cheap coatings in Austin garages: park a car with 150-degree summer tires on a marginal coating and the coating comes up with the tread.
A proper two-day system — epoxy or polyaspartic base with broadcast flake, then a polyaspartic topcoat — is walkable in about a day and ready for vehicles within two to three days.
The Payoff of Doing It Right
A correctly installed coating over a properly cured slab should last 15 to 20 years in a residential garage with almost no maintenance beyond sweeping and the occasional mop. Every shortcut — coating early, skipping the moisture test, etching instead of grinding — takes years off that number. If you have a new slab and want it coated, we will test it, tell you honestly whether it is ready, and quote the right system for how you use the space. See our epoxy flooring and concrete services or contact us for a free evaluation.
Need Help With This?
Our licensed professionals are ready to help. Get a free, no-obligation consultation.
Get a QuoteRelated Services

Austin Home Service Pros
The Austin Home Service Pros team shares expert tips, maintenance guides, and home improvement advice to help Austin homeowners make informed decisions.